
You’ve been watching your baby push up on their arms during tummy time, rock back and forth on their hands and knees, and edge their way across the play mat in a motion that’s somewhere between sliding and launching. Every day you think: today’s the day. And then they look up at you, completely satisfied with themselves, and don’t go anywhere.
Crawling is one of those milestones that can feel like it’s taking forever — and then suddenly, it happens. One morning your baby figures out the coordination, and within 48 hours you’re babyproofing the entire house at speed.
If your baby isn’t crawling yet and you’re wondering whether they’re on track, this guide is for you. We’ll cover exactly when most babies crawl, the different ways babies move before and instead of traditional crawling, what you can do to support the process, and the specific signs that warrant a conversation with your pediatrician.
Key Takeaways
- Most babies start crawling between 7 and 10 months, but some start as early as 6 months or as late as 12 months — all within the normal range.
- Traditional hands-and-knees crawling is not required for healthy development — some babies belly crawl, scoot on their bottom, or go straight from sitting to pulling up to standing.
- Tummy time from birth is the single most important thing you can do to build the strength needed for crawling.
- According to Cleveland Clinic pediatric physical therapist Dr. Christin Close, crawling “provides a full-body workout that strengthens the hands, arms, legs, core, hips and shoulders for later skills like walking and running.”
- If your baby is not showing any interest in moving or exploring by 12 months, or is showing significant stiffness or floppiness, a pediatrician or pediatric physical therapist evaluation is recommended.
When Do Babies Start Crawling? The Honest Timeline
Most babies begin some form of crawling between 7 and 10 months. This is a wide range — and intentionally so. Development genuinely doesn’t follow a strict schedule, and the variation between perfectly healthy babies is significant.
Some babies show early signs of forward movement around 6 months, dragging themselves across the floor with belly crawling before they develop the strength for the traditional hands-and-knees position. Others are content to sit, reach, and roll until 10 or 11 months before crawling emerges. A small number of babies skip crawling entirely and move from sitting to pulling up to standing — and these babies are not developmentally behind.
What matters more than the exact age is the trajectory: is your baby building strength, showing interest in movement, and making gradual progress? A baby who is working toward mobility — even slowly, even in an unconventional way — is doing exactly what they should be doing.
Types of Crawling: What Your Baby Might Do Instead
Many parents expect the classic hands-and-knees crawl and then worry when their baby does something different. Here’s the full picture of how babies get mobile.
Rolling to Move
Some babies discover that rolling is an efficient way to get from point A to point B. Log-rolling — flipping side over side across the floor — is independent movement, and it builds coordination and spatial awareness even if it’s not what anyone would traditionally call crawling. Babies who roll to get around are usually doing it on purpose, and it’s a developmental positive.
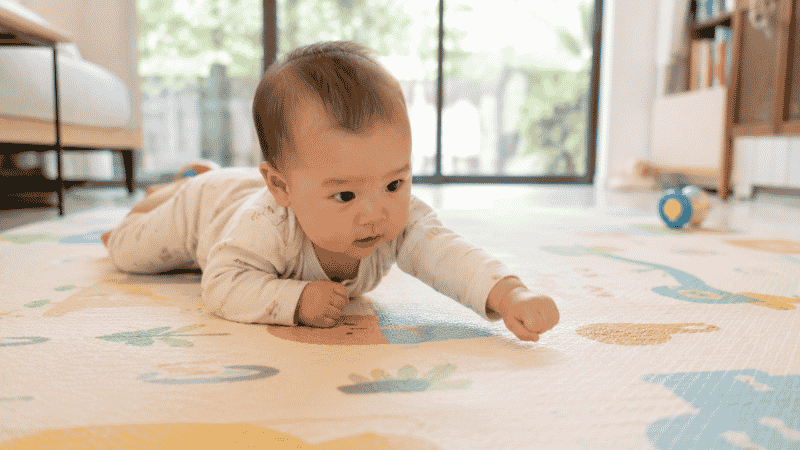
Belly Crawling (Commando or Army Crawl)
This is typically the first form of true forward movement. Your baby drags their belly across the floor, using their arms to pull and their legs to push — like a miniature commando. Belly crawling commonly starts around 7 to 8 months and represents a significant achievement: the baby has figured out how to coordinate arms and legs for directional movement, even if they haven’t lifted their belly off the floor yet.
Belly crawling is a completely valid form of crawling, not a lesser version of it. Many babies who belly crawl never transition to hands-and-knees crawling — they go straight from belly crawling to pulling up and walking. This is not a concern.
Classic Hands-and-Knees Crawling
This is what most people picture: both hands and knees on the floor, with opposite arm and leg moving forward together (right arm + left knee, then left arm + right knee). This coordinated, cross-lateral movement is a significant neurological achievement — it requires the two halves of the brain to work in sync.
Classic hands-and-knees crawling typically emerges between 9 and 10 months, often after a period of belly crawling. Some babies go directly here without the belly crawl phase.
Bottom Scooting
Some babies sit upright and push themselves forward using one or both legs — what many parents call “booty scooting.” This doesn’t look like crawling, but it is independent movement, and it’s meaningful. Bottom scooters are often very efficient movers and may scoot for several months before transitioning to walking.
Research published in Developmental Science suggests that bottom-scooting babies sometimes walk later than crawling babies because scooting is so effective — they have less motivation to change strategies. If your baby is scooting confidently and showing normal strength and development in other areas, this is generally not a concern, but worth mentioning at your well-child visit.
Bear Crawling
Bear crawling — on hands and feet with straight arms and legs, bottom in the air — is less common and often seen as babies transition from crawling to walking. It looks a bit unusual but is perfectly normal and often a sign of strong core and shoulder strength.
Why Crawling Matters for Development
Crawling is worth supporting for reasons that go well beyond mobility. According to Dr. Christin Close, pediatric physical therapist at Cleveland Clinic, crawling is essentially a “full-body workout” that builds the foundational strength for almost everything that comes after.
Upper body and core strength. Weight-bearing through the arms and hands builds shoulder stability and core strength that support sitting, reaching, and eventually writing.
Hand strength and fine motor development. When babies crawl, the small muscles of the hands are activated in a way that supports later precision grip skills — holding a pencil, fastening buttons, using utensils.
Hand-eye coordination. Navigating toward a target while supporting weight on moving limbs requires the eyes and hands to work together constantly. This builds the hand-eye coordination needed for throwing, catching, and eventually reading and writing.
Cross-lateral brain integration. The opposite-arm-opposite-leg pattern of classic crawling coordinates the left and right hemispheres of the brain. Many developmental specialists believe this cross-lateral movement is important for later cognitive skills, though research in this area continues.
Spatial awareness and problem-solving. Crawling babies learn to navigate obstacles, judge distances, and understand their body in space — foundations for physical confidence and risk assessment.
This is why tummy time and floor time matter so much in the months before crawling. They’re not just about crawling itself — they’re building a foundation for a wide range of later skills.
How to Help Your Baby Crawl: What Actually Works
You can’t rush crawling, but you can create the conditions that make it more likely to happen sooner. These approaches are recommended by pediatric physical therapists and are grounded in developmental science.

Make Tummy Time a Daily Non-Negotiable
Tummy time is the most evidence-supported thing you can do to build crawling readiness. When babies spend time on their bellies, they strengthen the neck, shoulders, arms, and core muscles that crawling requires. Without adequate tummy time, babies simply don’t develop the muscle strength to lift their belly and move forward.
Cleveland Clinic recommends building toward approximately 10 minutes of tummy time per month of age per day — spread across multiple sessions. A 6-month-old should be working toward 60 minutes total across the day, done in shorter bouts when awake and supervised.
For babies who resist tummy time: try it on your chest (baby facing you), use a rolled towel under the chest for slight support, get on the floor at eye level so your face is the motivation, or do tummy time on a slightly inclined surface like a nursing pillow. Most babies who initially resist tummy time build tolerance with consistent daily practice.
Give Babies More Floor Time, Less Container Time
Bouncers, swings, car seats, strollers — these are useful tools, but they restrict the free movement that builds crawling strength and coordination. Babies who spend most of their waking hours in containers have fewer opportunities to practice the movements that lead to crawling.
The simple fix: when you have a safe, supervised window, put your baby on the floor. A firm play mat on the floor is the ideal environment. Limit time in containers to what’s functionally necessary.
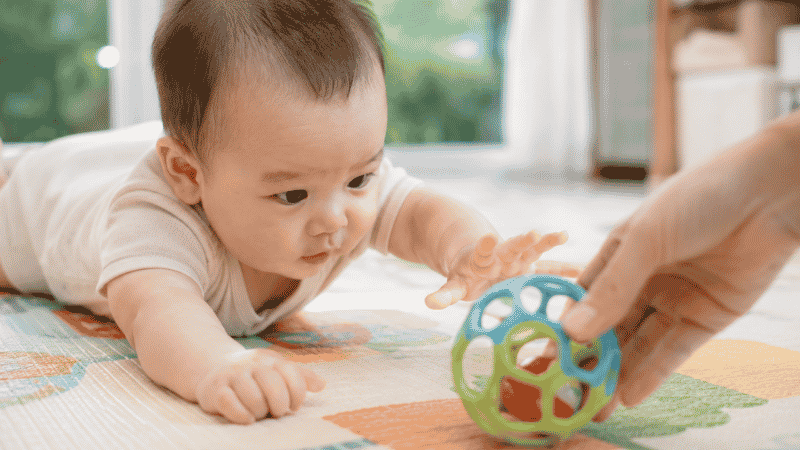
Place Toys Just Out of Reach
Motivation is a powerful developmental tool. During tummy time and floor play, place a favorite toy just slightly beyond your baby’s reach — close enough to be visible and desired, far enough to require effort to get there. The reach-and-shift movement this produces is exactly the weight-shifting that precedes crawling.
As your baby gets stronger, increase the distance. The goal is always for the toy to be achievable with effort.
Get Down on the Floor With Your Baby
Your face and voice are among the most powerful motivators in your baby’s world. Getting on your hands and knees at their level — even demonstrating a crawling motion yourself — gives them a visual model and a reason to move toward you. Stay just out of arm’s reach and encourage them to come to you.
This is not about forcing or drilling — 10 to 15 minutes of engaged floor play, done consistently, compounds over weeks into significant developmental progress.
Avoid Walkers and Standing Activity Centers as Primary Activities
Baby walkers (wheeled devices that suspend babies in an upright position) have actually been shown in research to delay walking milestones — and they can also delay crawling by reducing floor time and the motivation to develop independent movement. The AAP recommends against using baby walkers. Standing activity centers (stationary, not wheeled) are safer but should complement, not replace, floor time.
What If My Baby Is 9 Months and Not Crawling?
First: take a breath. The range of normal extends to 12 months for first crawling, and some babies skip it entirely. If your 9-month-old is not crawling but is:
- Rolling or scooting to get around
- Showing interest in exploring their environment
- Sitting unsupported with good balance
- Bearing weight on their legs when held upright
- Making gradual progress in floor mobility
…then they are almost certainly on a normal developmental trajectory, just on the later end of the range for crawling specifically. Keep doing tummy time and floor play consistently and mention it at your 9-month well-visit.
If your 9-month-old is not doing any of the above — not rolling, not scooting, not showing interest in movement, or seems to have unusually low or high muscle tone — that’s worth bringing up with your pediatrician sooner rather than later.
Home Safety When Crawling Begins: Babyproofing Basics
When crawling arrives, it arrives fast. Most parents are surprised by how quickly a previously stationary baby becomes a fully mobile one. A few days after that first coordinated crawl, your baby may be across the room before you’ve finished your coffee.
Before crawling begins:
- Install safety gates at the top and bottom of stairs
- Secure heavy furniture to walls (bookshelves, dressers, television stands)
- Cover electrical outlets
- Move small objects, choking hazards, and anything toxic to well above baby’s reach
- Check the floor for loose cords, sharp edges, and anything you wouldn’t want in a baby’s mouth
Once crawling is established:
- Get on your hands and knees and do a visual sweep at baby’s level — you’ll see hazards that aren’t visible from standing height
- Check under furniture — crawling babies discover things you didn’t know existed under couches and beds
- Secure any furniture your baby might use to pull up on — they’ll start attempting this within weeks of crawling
The transition from stationary to mobile happens faster than almost every parent expects. Getting ahead of babyproofing before crawling begins is genuinely easier than doing it urgently after.
Warning Signs: When to Talk to Your Pediatrician
Contact your pediatrician or ask for a referral to a pediatric physical therapist if:
- Your baby is not showing any interest in movement or exploring by 9 to 10 months
- Your baby is not crawling, scooting, or moving independently in any direction by 12 months
- You notice significant asymmetry — always dragging one side of the body, or consistently favoring one arm
- Your baby seems unusually stiff (high muscle tone) or unusually floppy (low muscle tone)
- Your baby loses a skill they previously had — this is always worth evaluating promptly
- Your baby is not pulling up to standing by 12 months
- You have any concern about motor development — trust your instincts
Early intervention for motor delays is significantly more effective than waiting. Pediatric physical therapy can make a substantial difference in trajectory when started early.
FAQ: What Parents Ask About Baby Crawling
Is it okay if my baby skips crawling entirely? Yes. Some babies go from sitting directly to pulling up, cruising along furniture, and then walking without ever crawling. While crawling offers developmental benefits, skipping it is not associated with long-term developmental problems. If your baby is otherwise meeting milestones and showing good strength and coordination, skipping crawling is not a concern.
My baby only belly crawls. Should I teach them to crawl “properly”? Belly crawling is proper crawling — it’s just an earlier form of it. Many babies belly crawl for weeks or months and never transition to hands-and-knees crawling; they go directly to pulling up and walking. There’s no need to intervene or try to change the crawling style.
When do babies start crawling after rolling? Rolling typically starts around 4 to 6 months, and crawling typically follows at 7 to 10 months. The gap between rolling and crawling can be anywhere from a few weeks to several months — both ends of that range are normal.
My baby gets frustrated and cries during tummy time. What do I do? Short, frequent sessions work better than long ones for resistant babies. One to two minutes several times per day is more productive than ten minutes of crying. Get on the floor with them, make eye contact, use toys and mirrors to engage them. Most babies who resist tummy time build tolerance within a few weeks of consistent practice.
Can crawling babies go in a baby carrier? Yes. Baby carriers and wraps are safe and useful even once your baby is crawling. Wearing your baby doesn’t replace floor time — make sure crawling babies still have ample supervised floor time for development.
My baby started crawling and immediately started pulling up on furniture. Is that normal? Very normal. Pulling up typically follows crawling very quickly — sometimes within days. This is because the strength and coordination required for crawling also supports pulling up. Ensure furniture is secured to walls before this happens.
Crawling Is Coming — On Your Baby’s Schedule
The waiting is the hard part. Watching your baby rock on their hands and knees for weeks, knowing they’re so close, takes patience that parenting consistently demands and sometimes doesn’t reward quickly enough.
But here’s what’s happening in those weeks of seemingly not-quite-crawling: your baby is building the exact combination of strength, coordination, and neural connection that will make crawling — and everything after it — possible. The rocking is practice. The pivoting is practice. The frustrated little lunges that don’t quite work are practice.
And then one day, it clicks. And you’ll spend the rest of the week keeping them out of the dog’s water bowl.
Keep doing the tummy time. Keep making the floor the most interesting place in the house. And know that it’s coming.
What to Read Next
- When Do Babies Roll Over? A Realistic Guide to This Big Milestone — Rolling is the motor foundation that crawling builds on — here’s everything you need to know about this earlier milestone
- Baby Growth Spurts: When They Happen, What They Feel Like & How to Survive Them — Developmental leaps often coincide with motor milestones like crawling — this explains what growth spurts look and feel like
- Newborn Baby Care: The Complete Guide for First-Time Parents — Tummy time starts from day one — this guide covers how to incorporate it from the newborn stage
References
- Cleveland Clinic. When Do Babies Start To Crawl? And Why Is It Important? Health Essentials, February 2026. https://health.clevelandclinic.org/when-do-babies-crawl
- American Academy of Pediatrics. Movement: 8 to 12 Months. HealthyChildren.org, 2023. https://www.healthychildren.org/English/ages-stages/baby/Pages/Movement-8-to-12-Months.aspx
- Centers for Disease Control and Prevention. Important Milestones: Your Baby By Nine Months. CDC, 2023. https://www.cdc.gov/ncbddd/actearly/milestones/milestones-9mo.html
- Adolph KE, Tamis-LeMonda CS. The costs and benefits of development: The transition from crawling to walking. Child Development Perspectives, 2014. doi:10.1111/cdep.12085
This article is for informational purposes only and does not constitute medical advice. Always consult your pediatrician with specific concerns about your baby’s motor development.